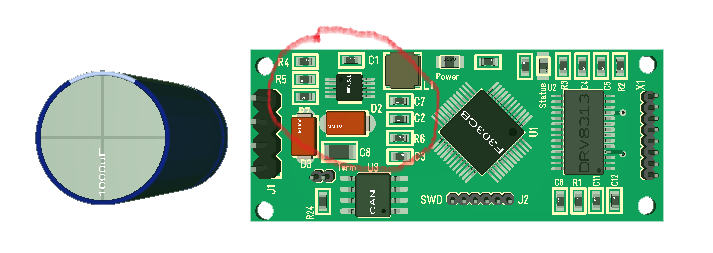
The drawing below illustrate my New, planned DRV8313 based BLDC Controller Design:
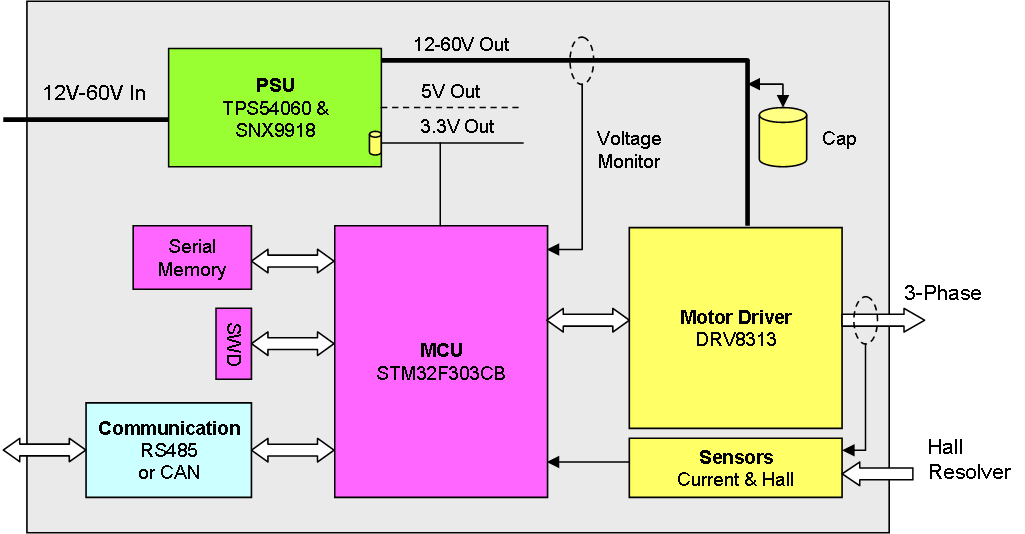
This will give a small BLDC Controller capable of 8V to 60V operation with up to 2.5A on 3-Phase motors with or without Hall sensors.
- 8-60V operation
- Perfect for 12V, 24V or 48V systems.
- Up to 2.5A motors
- Sensorless or Hall Sensor driven
- Full FOC support.
- Focus on speed/position control on small motors.
- Drive 3-Phase, DC motor or solenoids.
- RS485 or CAN
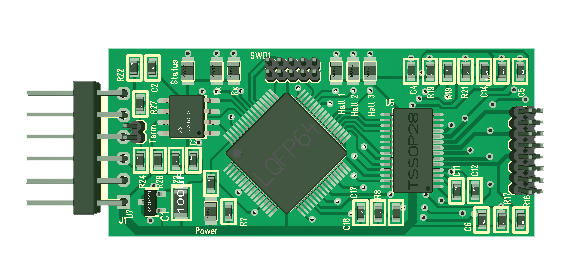
- STM32F303 MCU
I use STM32F303CB as MCU because of their build-in programmable Op-Amps that can be connected to ADC input lines. F303 comes in LQFP48 package and is priced < 2.- USD even if it is a M4 ticking at 72Mhz. This is one of the more attractive motor controller MCU’s around. It contains 128Kb Flash and 40Kb SRAM, of which some are CCM and can be used to execute fast code.
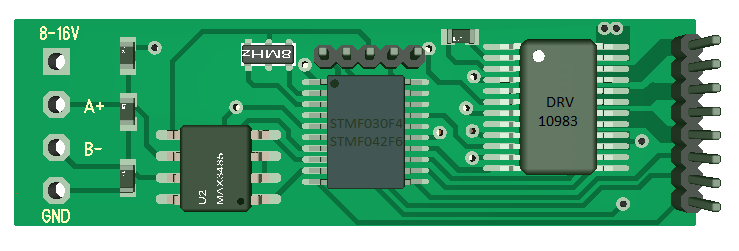
Motor Driver will be DRV8313 that is popular on various Gimbal drivers. This allow individual Half H-Bridge driving, so it is basically just a chip with Gate Drivers, MOSFET’s and a bit of logic. It is possible to add 3 individual current sensors. Each channel can be controlled separately, meaning we can drive a 3-phase motor, DC motor or 3 x solenoid’s. But, the focus is small Brushless motors with Hall sensors that need to drive slow.
Sensors are 1 x DC Rail sensor, 3 x current sensors, 3 x Hall sensors and temperature sensors. The idea is to have 3 separate current sensors to enable sensorless mode and individual channel usage. Current sensors on this consist of a Shunt, a low pass filter and Op-Amps on the MCU itself. Depending on available pins/space I might make available some external IO pins.
Communication is RS485 and/or CAN. I will use a new SWD connector based on 5/6-pin Micro JST.A serial Flash or EEPROM will be evaluated for storing parameters.
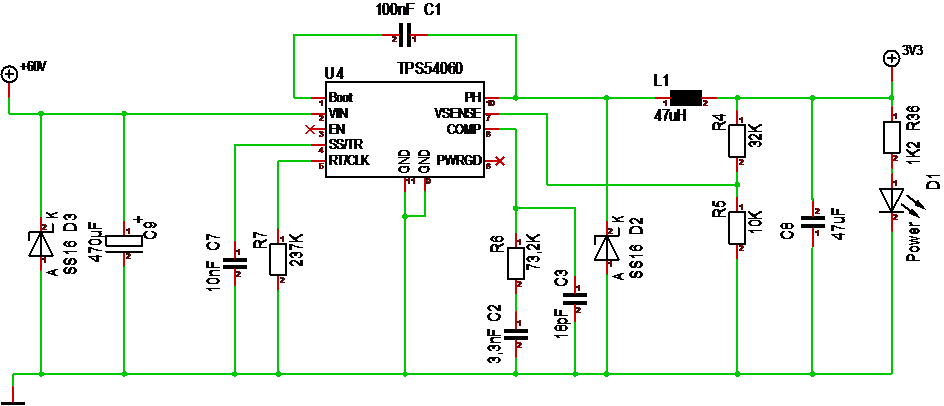
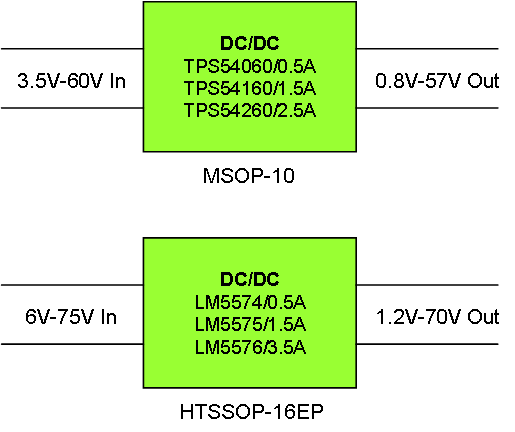
PSU will be based on TPS54060 and optionally SNX9918 if we need both 5V and 3.3V. I will try to add 1000-3300uF Caps on the 8-60V directly connected on the board and preferable between the DRV8313 and the rest of the system. I will also attempt to add the 0.33 supercap used on MC4X15A.
The name of this will be MC3X3A. The initial plan is that I will attempt a narrow controller 15mm to 20mm width and 50 to 70mm length., but actual size will be adapted as I go as usual.
As for moving on – I want to test both DRV8313 and TPS54060, so I might give this design a bit priority. I have all the components, but making this design will put my knowledge a bit. Last time I tried DRV8313 I decided to cancel the design. It was the combination of 12V limitation and size as well the plans to move on with STM32F030 and DRV10983. And I still plan to make a new, updated DRV10983 design as well. One step at the time I would also like to move on with much, larger motor controllers at some point.