PCB Shortcut

This was a rare bug on the XPortHub! I have not bothered to test the super-cap/battery for the VBAT much, but suddenly realized as I was doing other changes that I had an error message related to this. And correct – measuring the PCB I have a self infected short-cut. CNC machinery making PCB’s require a minimum of 0.14mm distance between lanes to guarantee that lanes are not shorted and this is shorted by accident.

The EDA warns me, so this is me overlooking the error message. I have a package overlap here because I have an alternative connector – this generate error messages I have to overlook and I obviously overlooked one I should not have overlooked. It’s no big deal because this could very well have been connected. The only component I shortcut is a diode that should prevent leakage back to other circuitry. But, it means the battery will power the entire circuit, not just VBAT.

I keep repeating myself – I always need a minimum of 2 PCB layout’s. The more I push to work faster the more of these minor bugs I am guaranteed – but, that is ok – I just plan for it.In this case I want to add a proper battery holder on 1.1 anyway.

FAT FS Middleware

FATFS is a middleware component you can add to create a MicroSD API with full file I/O support. It only takes a few clicks with CubeMX and you have an API with the following and more:

  • f_mount(): Register/Unregister a work area
  • f_open(): Open/Create a file
  • f_close(): Close a file
  • f_read(): Read a file
  • f_write(): Write a file
  • f_lseek(): Move read/write pointer, Expand a file size
  • f_truncate(): Truncate a file size
  • f_sync(): Flush cached data
  • f_opendir(): Open a directory
  • f_readdir(): Read a directory item
  • f_getfree(): Get free clusters
  • f_stat(): Check if the object is exist and get status
  • f_mkdir(): Create a directory
  • f_unlink(): Remove a file or directory
  • f_chmod(): Change an attribute
  • f_utime(): Change timestamp
  • f_rename(): Rename/Move a file or directory
  • f_chdir(): Change the current directory
  • f_chdrive(): Change the current drive
  • f_getcwd(): Retrieve the current directory
  • f_getlabel(): Get volume label
  • f_setlabel(): Set volume label
  • f_forward(): Forward file data to the stream directly
  • f_mkfs(): Create a file system on the drive
  • f_fdisk(): Devide a physical drive
  • f_gets(): Read a string
  • f_putc(): Write a character
  • f_puts(): Write a string
  • f_printf(): Write a formatted string
  • f_tell(): Get the current read/write pointer
  • f_eof(): Test for end-of-file on a file
  • f_size(): Get the size of a file
  • f_error(): Test for an error on a file
  • disk_initialize(): Initializes the physical  disk drive
  • disk_status(): Returns the selected physical drive status
  • disk_read(): Reads sector(s) from the disk
  • disk_write(): Writes sector(s) to the disk
  • disk_ioctl(): Controls device-specified features
  • get_fattime(): Returns the current time

XPortHub Update

I finally managed to sort out the CubeMX/SW4STM32 error so I can move on a bit. The XPortHub (pictured above) is coming together very well. Sadly I have to upgrade this due to the Flash footprint error, so I will make some other adjustments as well.

CubeMX auto-generate all drivers with pin-setting, FreeRTOS, USB driver and even the FATFS system allowing the Micro SD Card to be used as a disk.

The pin-out above shows how dense this design is getting with only 5 spare pins. Using the USB as a serial link with a little console app this basically have more content than my first IBM PC back in 1983. It bring back some nostalgic reflections to my early days fiddling with DOS and C compilers.

What I will do next is actually to create a terminal application and a CLI with a Utility package that in many ways with mimic the old DOS/Console days.

CubeMX Strikes Again

I would like to simplify all Java applications, so I suggest I create my own Java 3 VM. It will only need one instruction:

CRASH

I had a project for XPortHub in CubeMX that worked well, upgraded CubeMX and shit hit the fan. Obviously the new CubeMX generate or don’t generate some script that SW4STM32 don’t like. I like CubeMX, but I am not impressed with ST Microelectronics complete lack of SW quality! I will get around this, but it is a major time-waster!

Cold Soldering

Soldering 0.5 pitch components is a challenge to get right. My latest problem have been cold soldering. Meaning that pins look ok, but as I test them I have no connection. Not sure if this is lack of temperature, lack of solder tin or what, but I will have to find a more reliable way because it has caused a lot of issues lately.

The illustration above shows the problem. Pins look as if they are soldered, but in fact they are not. I suspect a combination of to little paste and to low temperatures, but lets see.

Having MCU’s you don’t trust don’t help, but just for the record the one I tested did work!

New MCU’s

It is rare that I receive chips from China as unprofessional as these, but it does happen. I have no idea if these works at all yet, but we will see. If not the seller will loose out. I actually mounted a XPortHub, so we will see – but, this is why I want to build the test-bench with sockets.

Wrong Footprint

   This is the XPortHub mounted on top of a Rapsberry PI A+. The only lacking components are the SuperCap + the Serial Flash. I made the package for W25Q16 myself so I have no-one else to blame, but I have used a standard SO8 rather than the wider SO-8 footprint that I needed – bummer. Well, rev 1.1 coming up I guess.All in all I am quite happy with this Board.

Failure of the week

This would have been an awesome Hat, and I am “kind of” done routing the PCB, but my remaining challenge is the currents that I need to support. My PCB lanes for 36V+ is far to thin for 12-24A, so this will never work!

This version of the Hat have 12 x Current Sensors. One of the challenges is that DRV8315 have Pad’s going through all layers for venting and this act as a barrier against any routing signals. I could have managed this board with 4 layers, so I think it’s time to make that change.

The area between DRV8313 and the connectors get to dense in the first place and this is where I need to apply 36V+. The option I have is to use thick air wires, but I basically have no room for them.

The alternatives I have is (1) try to push some of the components to the back side, (3) use thick air wires, (3) use a larger PCB or (4) ditch current sensors.

This being a Hat the size is set, but I used a wider format on the 3KW motor controller so I can use the same here. One of the challenges with DRV8313 is that it has 2 VM pins separated rather than together. This is from a functional point an excellent driver, but the design require some space around the DRV8313 if you want to use it’s features.

 This is a mock-up of the wider board. I extend width from 65mm to 100mm. I need to change connectors a bit, but it is an illustration. I have not given up the original format yet, so lets see.

HAL Design

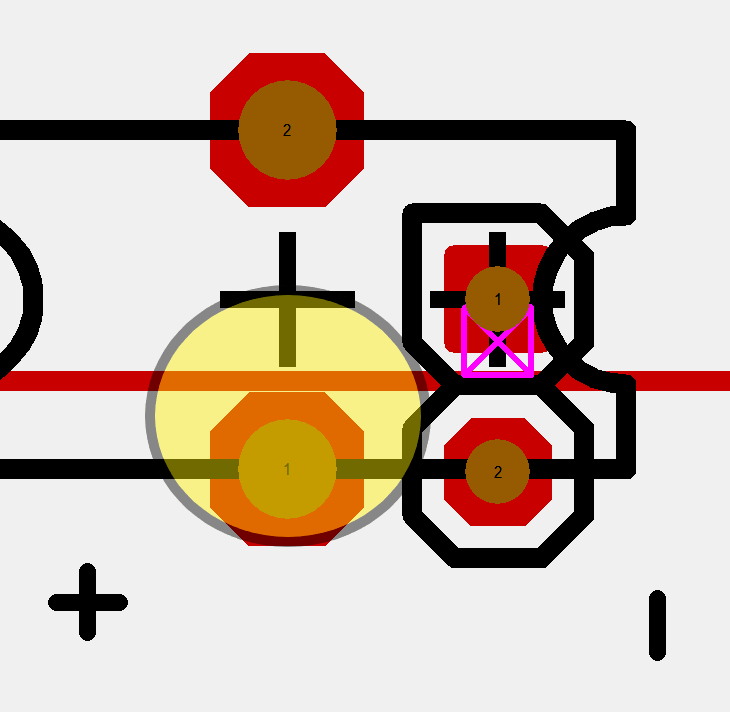
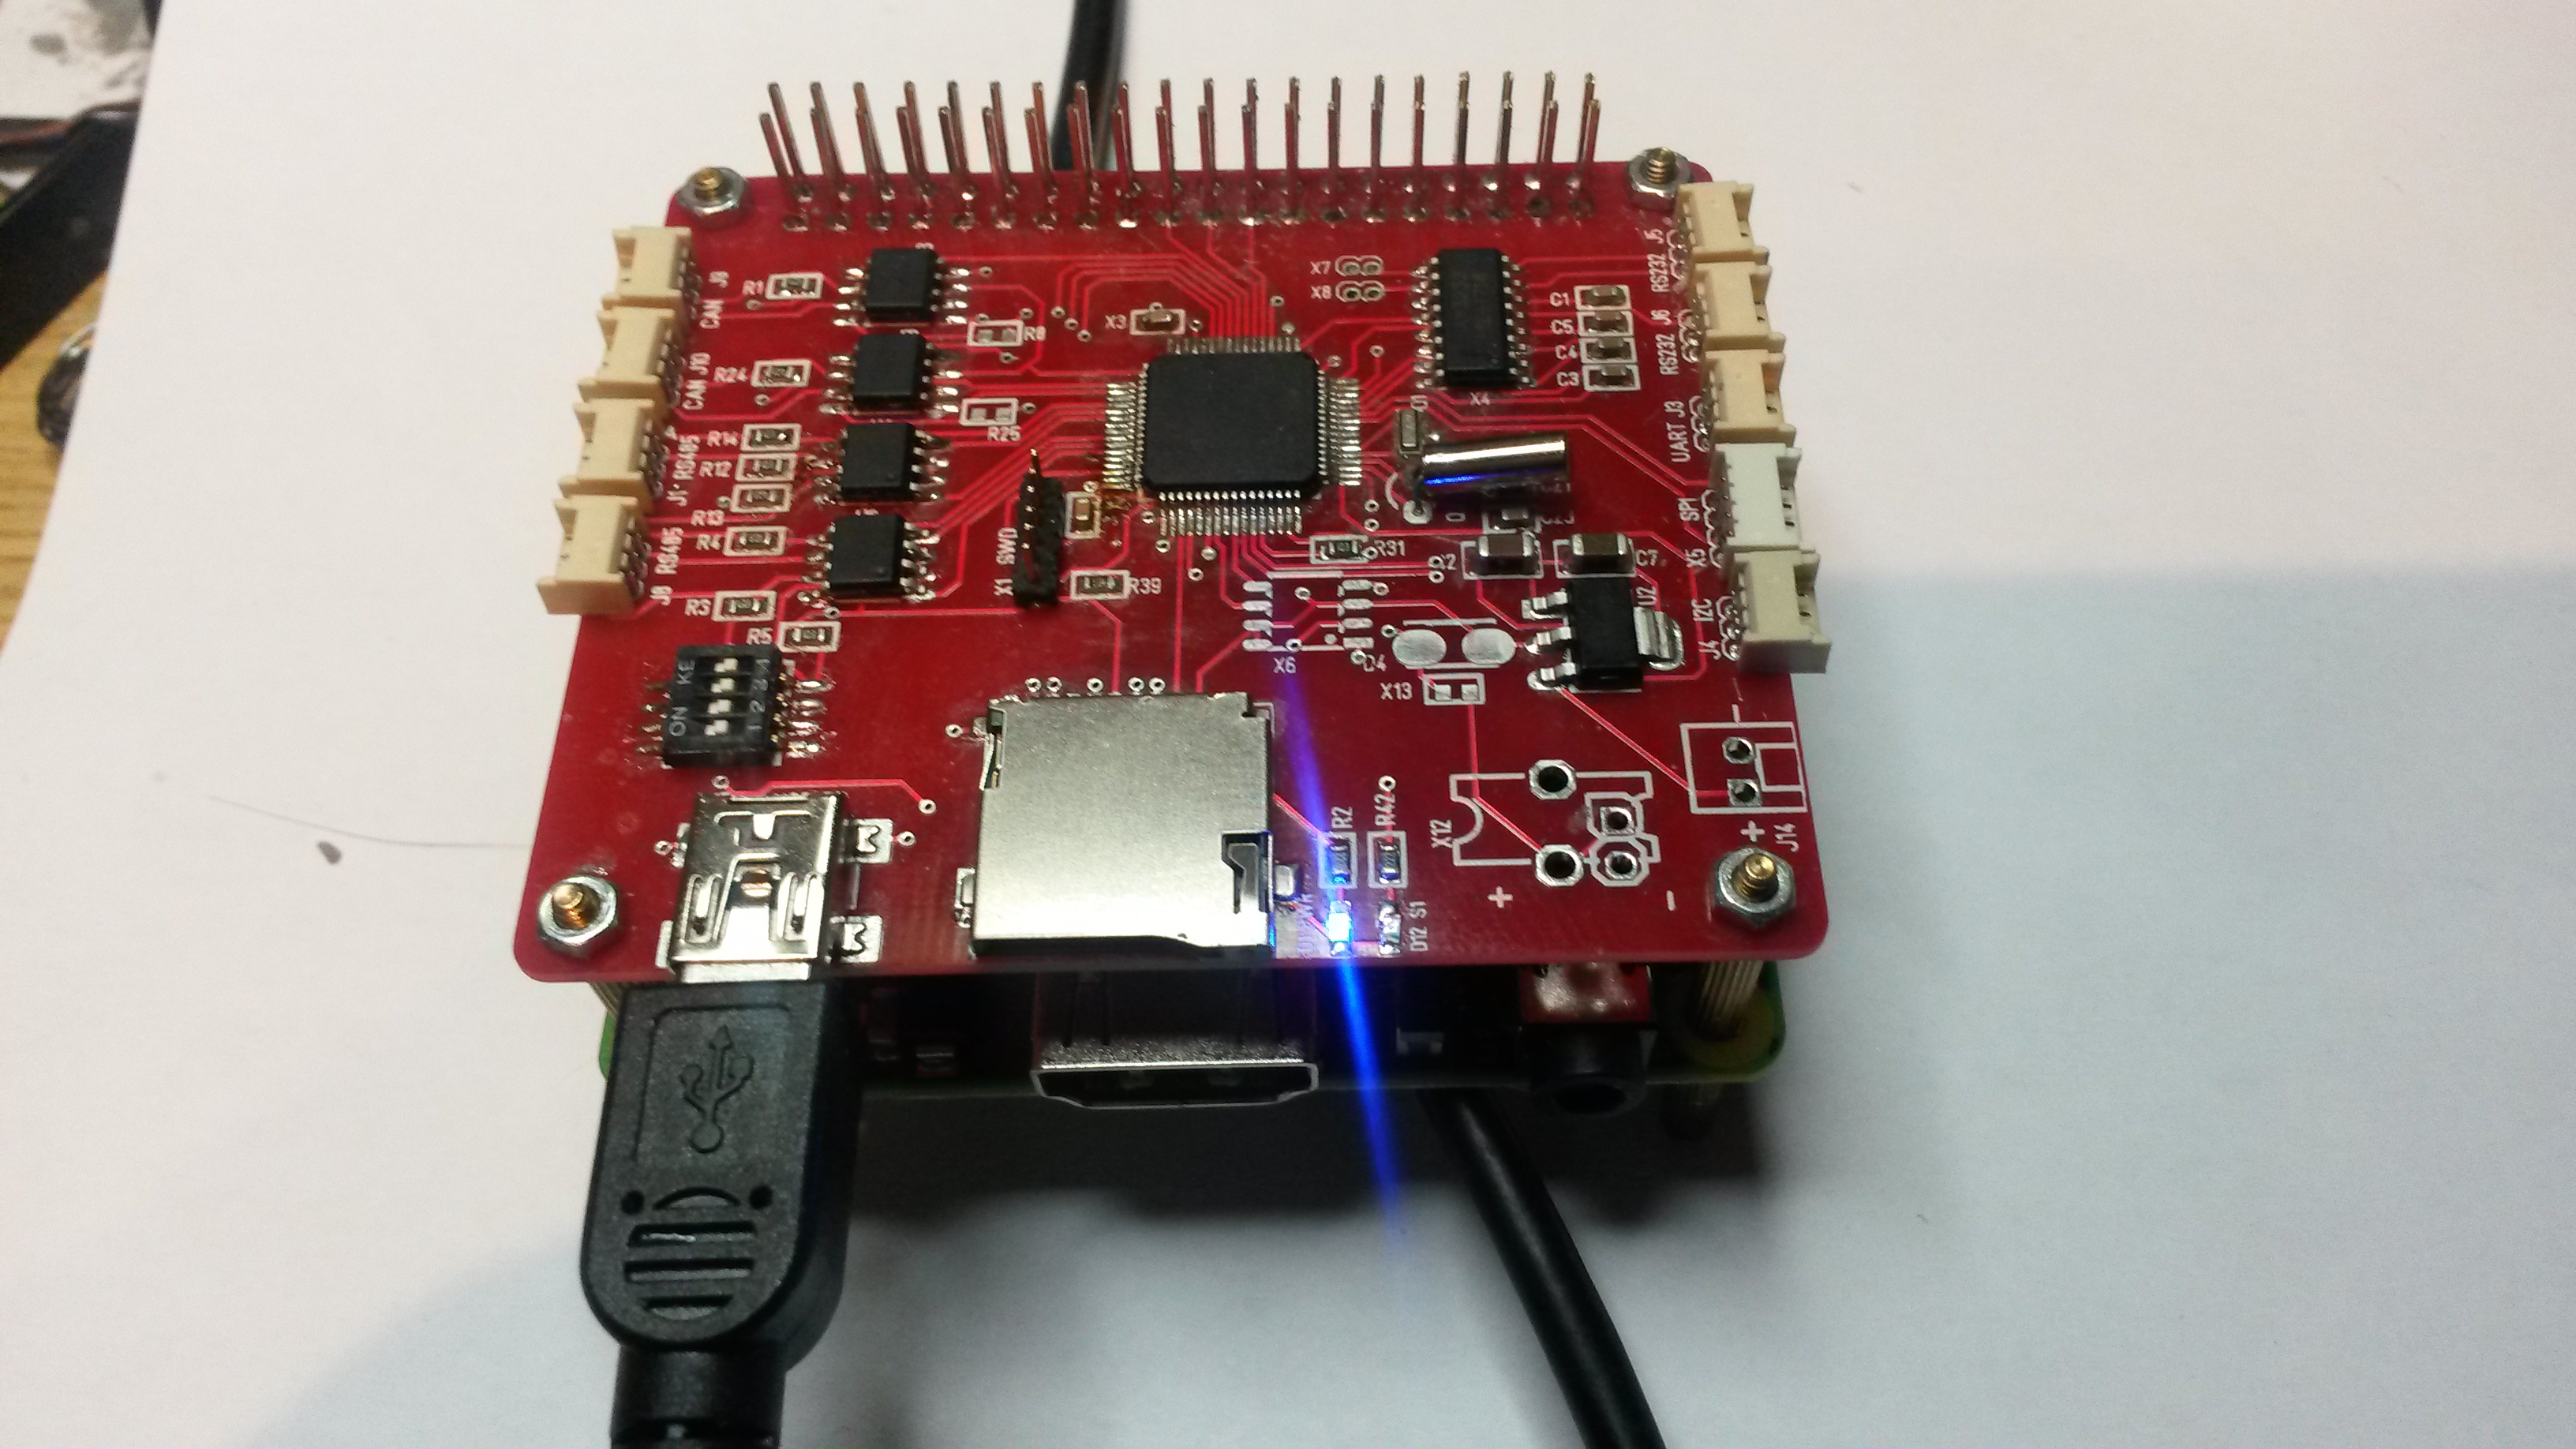
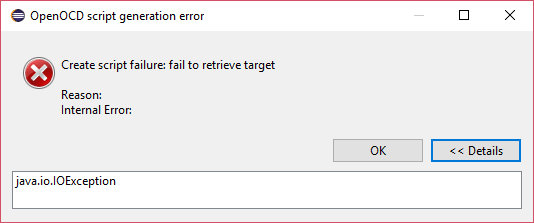
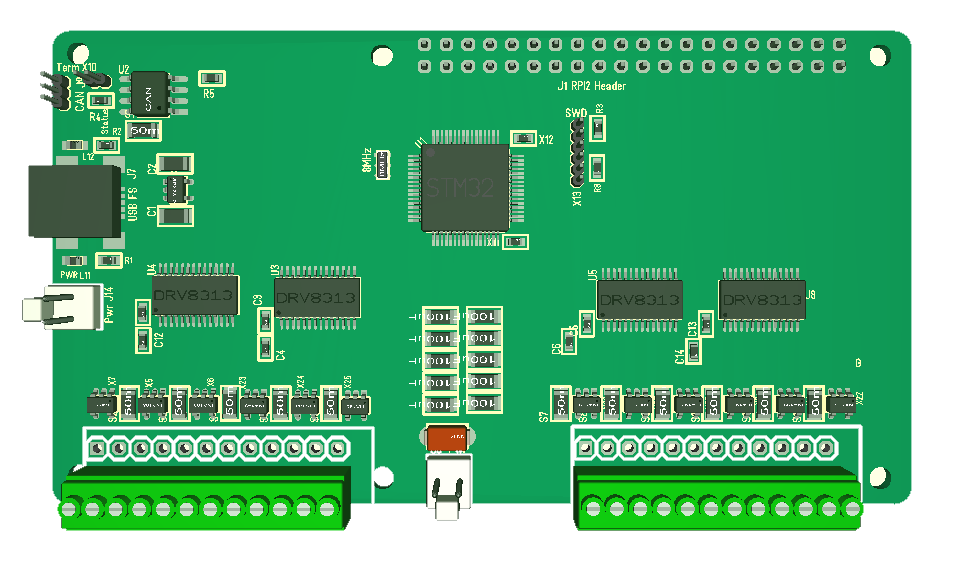
One of the next tasks as I emerge from my marathon Hat designs is to wrap up an actual HAL (Hardware Abstraction Layer) in C++ for STM32F405. The Drivers from ST is named “HAL”, but they are low level drivers or merely C functions to interface to registers. They lack abstraction and normalized user interfaces. One good example is CAN. My MCU stop as I try to start the auto-generated CAN, so I went into CubeMX and get the following screen:

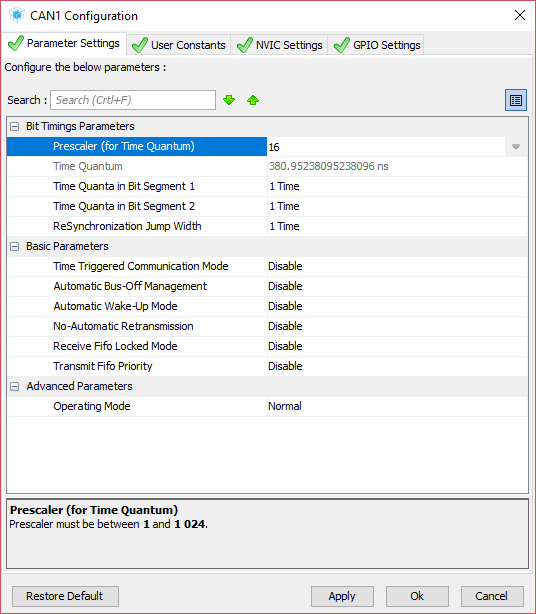
So where/how do I set bitrate?  Answer: with some difficulty! This is just an excellent example of stuff I don’t want to see in a HAL Interface because this is low Level driver stuff. I expect that the developer who create the HAL class actually deal with this and leave the rest of us a straight forward, well documented and normalized interface!

A proper HAL would actually have a function that allow you to set standard bit-rates as per ISO11898-2 that is the standard for CAN. To be honest I think many of the older ST drivers was better than these new “HAL” ones. I like ST’s MCU series, but their software department need to shape up!

I have mentioned before that one of the better “HAL” interfaces I have seen is the Arduino “Wire” library. Not the code itself, but the actual interface. I can’t use that 1:1 because that library is blocking and I want asynchronous schemes, but it is a good start. CAN as an example should only contain a few control functions Send/Receive/Init and the Init parameter should be baud-rate in normalized form. I admit that I have yet to look into what Mbed have done, so I will do that as well.

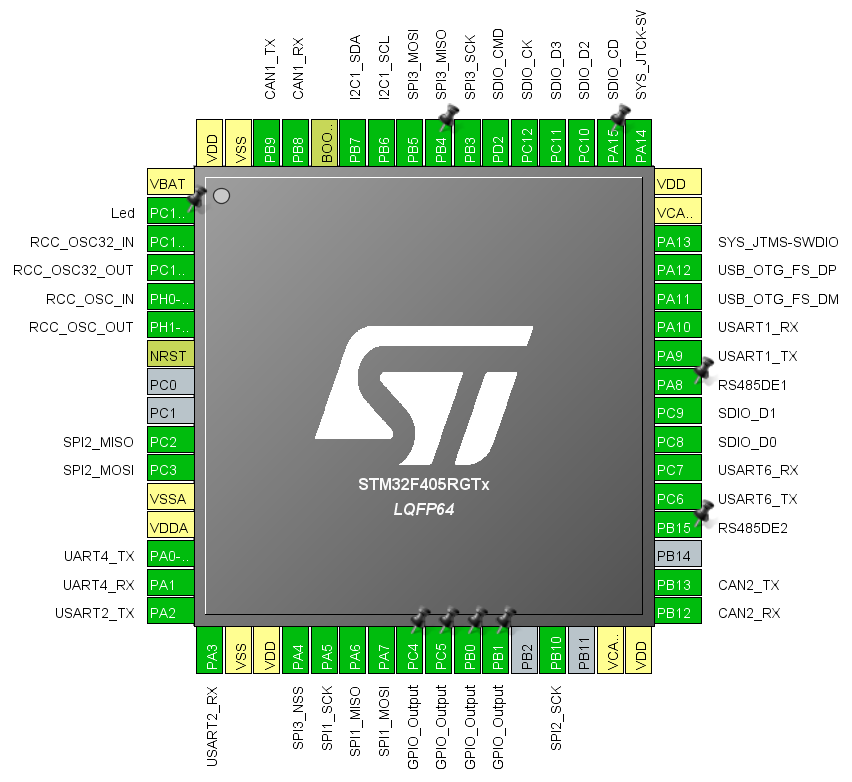
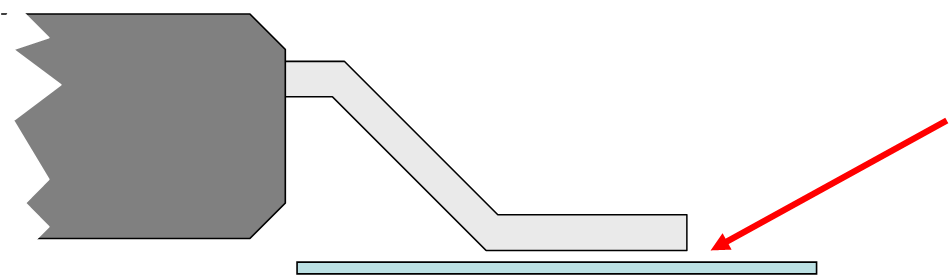
The most important to get right is actually GPIO pin mapping. Then writing code you often need to wire your electronics in software, meaning you need to know which pin that has a given function. The way I decided to do this was to create a class “hGPIO” and allow the user to map it’s logical pins to actual physical pins. This means that I declare a hGPIO variable “can1GPIO” and map pin1 as Tx, pin2 as Rx, pin 3 as On/Off, pin 3 & 4 Special purpose etc. My SW will be given a GPIO variable and expect the pins to follow that standard.

I don’t use an On/Off function on my CAN port’s yet, but my software don’t need to know that. In fact the only place in my software I should need to worry about actual schematics and driver setup is in a single AppInit function.

I have used both C and C++ on STM32 in the past, and I will still need to use C on some MCU’s. The reason is that GCC for some reason bloat a bit as we start C++ so we use up the first 65Kb Flash faster than with C. This is because C++ drag in libraries and it probably can be optimized, but I do not care about C++ on a 16Kb Flash MCU. On these small MCU’s I just use bare metal because I can’t afford the abstraction layer.

This is not a new task as I did this before and created a C++ library EFC (Embedded Foundation Classes) to go with it. But, time has changed and it’s time to move on so I want to re-visit my old designs and re-fresh them before I start writing loads of new stuff for now 10 Hat different Hat’s + some, but don’t worry my list of Hat’s I want to make is very long so it will still be plenty of electronics, but I will start moving more and more into Software and end-user projects through this year.

Happy New Year!