
This would have been an awesome Hat, and I am “kind of” done routing the PCB, but my remaining challenge is the currents that I need to support. My PCB lanes for 36V+ is far to thin for 12-24A, so this will never work!
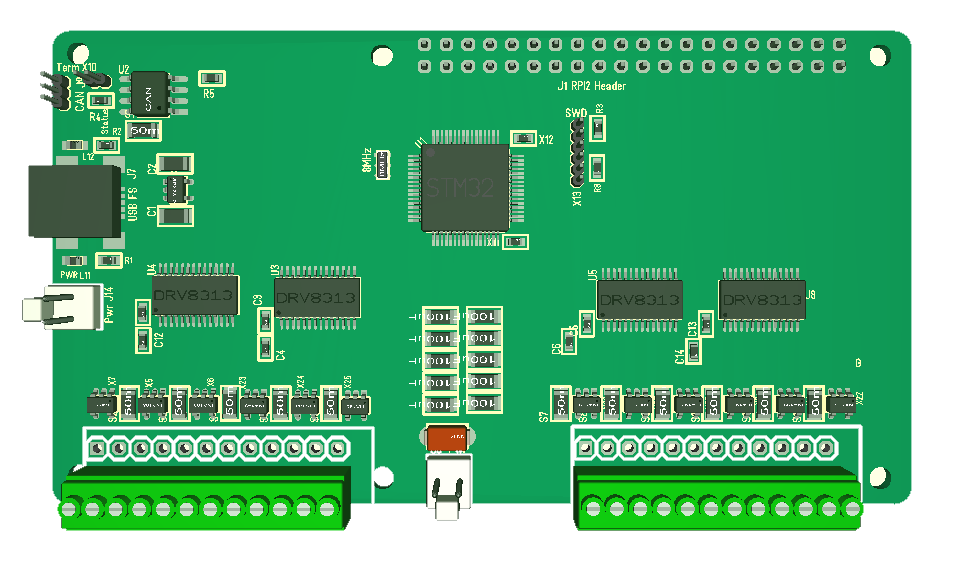
This version of the Hat have 12 x Current Sensors. One of the challenges is that DRV8315 have Pad’s going through all layers for venting and this act as a barrier against any routing signals. I could have managed this board with 4 layers, so I think it’s time to make that change.
The area between DRV8313 and the connectors get to dense in the first place and this is where I need to apply 36V+. The option I have is to use thick air wires, but I basically have no room for them.
The alternatives I have is (1) try to push some of the components to the back side, (3) use thick air wires, (3) use a larger PCB or (4) ditch current sensors.
This being a Hat the size is set, but I used a wider format on the 3KW motor controller so I can use the same here. One of the challenges with DRV8313 is that it has 2 VM pins separated rather than together. This is from a functional point an excellent driver, but the design require some space around the DRV8313 if you want to use it’s features.
This is a mock-up of the wider board. I extend width from 65mm to 100mm. I need to change connectors a bit, but it is an illustration. I have not given up the original format yet, so lets see.