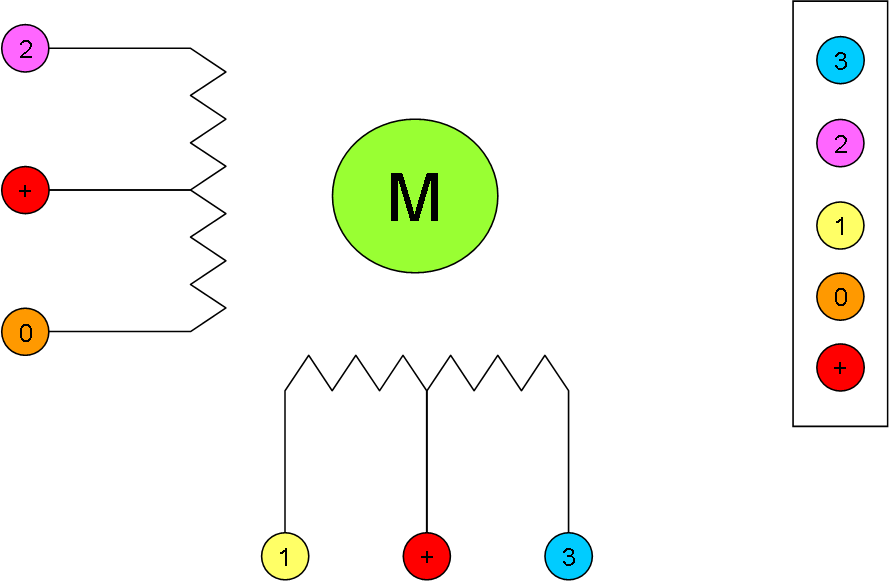
The logic for driving these stepper motors are straight forward as you apply 4 or 8 steps. The 4 step logic is faster and you rotate in a circle CW or CCW:
- Step 1: 0 + 1
- Step 2: 1 + 2
- Step 3: 2 + 3
- Step 4: 3 + 0
This will create a movement in one direction as you only move one step at the time, meaning you have position Control and speed Control by how fast you apply steps.
The 8 step logic is similar, but only uses half the speed.
- Step 1: 0
- Step 2: 0 + 1
- Step 3: 1
- Step 4: 1+ 2
- Step 5: 2
- Step 6: 2 + 3
- Step 7: 3
- Step 8: 3 + 0
To decrease the stepper logic even further we need to get a bit smarter because direct 0 and 1 logic cannot help us more. We can control speed and direction. Maximum speed us set by the minimum time we can have a coil on before it moves. I found that to be ca 3ms on 5V, but this will vary depending on the Stepper Motor. If you use 12V on a 5V Motor (which is a bit naughty) you might find that you can do this faster.
A stepper can’t increase speed much further due to cogging torque that is very strong on a stepper. On a 3-phase motor this will be weaker so we can increase speed though acceleration. This is not impossible, but it is not what a Stepper is created for. We can however decrease the steps further for a more accurate positioning system.
You have to be aware that as you decrease below full steps you also decrease the holding torque and your chances of a miss-step increases.
To decrease further we need to apply an analogue value on the steps. If we as an example allow a step to be 2.5V and 5V this would allows us to create a 16-step algorithm. But, how can we create an analogue output value using only PWM?
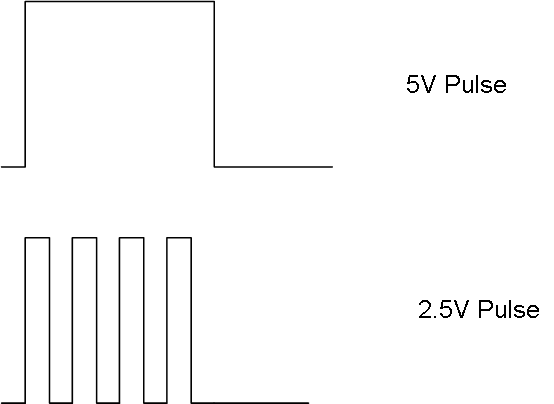
The answer is that a PWM with 100% duty is the same as 5V, while the same pulse with only 50% Duty is 2.5V. To drive a step we need output voltage on for a minimum of time. If we stop we will be “holding” that signal, so what we do is to build a PWM signal from a higher frequency where we can manipulate PWM duty and hence create a different analogue output value.
The picture above illustrate the two pulses. The 5V pulse is always on giving 5V out, while the 2.5V pulse is 50% on/off creating 2.5V output value. This will now allow use to create 16 steps. In fact using a sinusoidal curve we can now create as many micro-steps as we want.
The last trick is how you apply the 2.5V output value, because step 1 with 2.5V and 5V is still the same position. To use these mid positions you will always need 2 coils. Full steps are then one coil is on and the other off. This gives 2 position only. But, as we now can apply 2.5V we can evolve the logic as follows:
- Step 1c: 0=5V (full step)
- Step 2a: 0=5V, 1=2.5V
- Step 2b: 0=2.5V, 1=5V
- Step 2c: 1=5V (full step)
If you complete this table you will have 16 steps. And by adding 25% duty steps you have 32 steps etc. But, remember that cogging torque that hold your position will be weaker, so these micro-steps do come at a cost.

